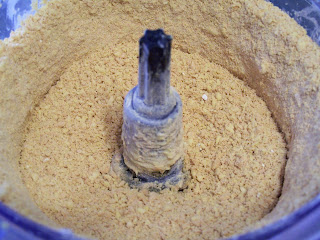
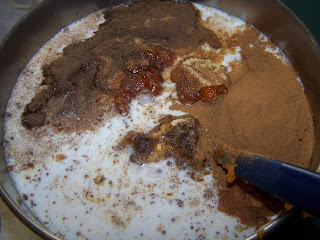
Sweet Potato Lard-bread Cookies

Monday, November 28, 2011

After my triumphant mastery of Kung Fu, I stared blankly into the remnants of my 3 cups of sweet potato flour. What could I make with this funky orange stuff? Then my eyes darted to the 4 lb block of pastured lard in my fridge. AHA! I knew immediately what I wanted to do.

What you'll need:

1/4 lb pure, fresh, pastured lard
1/4c granulated stevia, plus some for sprinkling (if you don't mind the carbs, you may use 2T honey instead, but please reduce baking temp to 325, and add 1t baking powder as well)
1/2t cardamom
1 large egg, separated
1 cup sweet potato flour
1t vanilla extract


Preheat oven to 350F
Using hand mixer, whip lard and sugar together. Fold in cardamom, vanilla, egg yolk, and flour until crumbly.
Notice the succulent aroma of bacon wafting toward you. Bo-nus!

Gently roll into large cookie-like disc, and wrap in plastic. Place in fridge for 30 mins.

Roll dough on to floured surface to about 1/2 in thickness.

Time to whip out your cookie cutters and go to town! Have fun with this part. No, really, I'll wait...


If you have managed to avoid eating your scraps straight up (mmm, lard...), gather them and re-chill. Roll out again and cut away until dough is gone.
Place cookies on a cookie sheet lined with parchment paper. Brush the tops of the cookies with whisked egg white and then sprinkle stevia on top.

Bake 8-10 min. Personally I like to undercook cookies a little, because they tend to finish baking AFTER you remove them from the oven (and the bottoms don't burn that way). This 10 min estimate allows for that under-doneness technique, so don't adjust. Allow to cool. Enjoy!

Mmm... just like Granny used to make!


NUTRITIONAL INFORMATION (makes 16 cookies):
93 cals, 7g fat, 7g carb, 1g protein

*This recipe adapted from La Cocina de Mama.

PJF White Chocolate Wonderful Chocolate Mousse Pie

Wednesday, November 23, 2011

When Make It Paleo was announced, I first whined at the husband for it for a while, pined, and simpered, then went behind his back to buy it since he didn't seem to be budging one way or another. (Sorry, honey, you make the money, I cooks the foods!)
When I ordered, I promptly informed Bill Staley & Haley Mason that I was going to find 1 recipe in their book and pimp it out PJF style. To which Bill responded with great verve that they would then re-pimp my pimped out pimpness. AHAHAHA! The gauntlet had been thrown down!
Bring it, brother.

When I received the book, I was overwhelmed. I felt very small and inadequate as a cook all of a sudden. I wasn't so sure I could live up to the challenge, but then... I found it. The one recipe I knew I could top. I have made it for several Thanksgivings. Bill & Haley had just turned it gluten free for me.

I will forewarn you that this is one of the worst sorta-but-not-quite-Primal cheats you'll be enjoying from me! If that got your attention, let's get on it.

What you'll need:
(Based on Make It Paleo's Chocolate pudding pie, and The PJF's original pre-Primal bad boy, 500 cal/slice White Chocolate Wonderful Chocolate Mousse Pie)

FOR THE CRUST:

2c almond flour
1/2c cocoa powder
1/2t salt
1/2t baking soda
1/2c palm shortening
1/4c maple syrup
2T vanilla extract


FOR THE FILLING:
3 egg yolks (reserve whites for whipping)
24 oz coconut milk (native forest or thai kitchen, people)
1/2c maple syrup
2T unflavored gelatin
1/2c cocoa powder
16T mascarpone
16T Peanut Butter & Co White Chocolate Wonderful (If you're gonna be a pansy & fuss about this, you can opt for Barney Butter combined with cacao butter, vanilla bean, and sweetener, but then it just wouldn't be the same. Not as fun, but there you have it, you mamby pamby)


FOR THE TOPPING:
1 pint heavy cream (grass fed if you can get it)
2 oz dark chocolate
6 sachets chocolate chai (you can get this from Republic of Tea or Zhena's Gypsy Tea Co)
OR
4 sachets Republic of Tea Double Dark Chocolate Mate and 1/4 tsp chili powder


BAKING DIRECTIONS FOR CRUST:
Preheat oven to 325F
In medium bowl, combine dry ingredients
In smaller bowl, combine wet ingredients (make sure to melt palm shortening before mixing it into the batter)
Combine wet ingredients with dry


Pat dough into a 9 inch glass pie dish, greased with some coconut oil (or butter). Bake for 10-15 mins, until the wafting aroma of chocolate fills the air.

FOR THE FILLING:
Soften peanut butter, and whip together with mascarpone in large bowl. Set aside.


Separate egg yolks from whites. Place whites in glass or copper dish and refrigerate (they like glass & copper better than plastic. Bet Bill & Haley didn't tell you that, huh!)

Combine egg yolks, coconut milk, maple syrup, gelatin, and cocoa powder in sauce pan. Bring to a light boil, stirring constantly.

Set aside and allow to cool.
Cover with plastic wrap and refrigerate until set (this can be done in the freezer in about an hour)

Whip egg whites until stiff and fluffy (a little sugar or cream of tartar will help them set up. Go super easy on the tartar though cuz it can make it taste ucka).

Gently fold egg whites into chocolate pudding. It should retain the bulk of it's fluff if done correctly (I did mine incorrectly to show you how flat it can get).

Spread peanut butter mascarpone evenly over pie crust, then layer with chocolate mousse.

FOR THE TOPPING:
Place your chai sachets into your cold cream and beat them up a little bit (if using Double Dark Chocolate Mate, add 1/4 tsp chili powder). Not enough to break the sachet, but enough to release the flavor. Allow to sit in fridge for a bit.
Meanwhile, gently melt you chocolate.
Remove tea sachets and whip cream until very nearly firm. Drizzle in chocolate and fold until evenly distributed. Spread into piping bag and swirl around pie.


Your move, guys.

PJF Crescent Rolls

Monday, November 21, 2011

When I was teaching myself Kung Fu, the first thing I needed to know was could my basic understanding produce an end product. To my delight, it did. I got this:


And that is what we're going to make today!


What you'll need:

PJF Kung Fu (one section)
Egg White


If your Kung Fu has been meditating in the freezer or fridge, you will want to let it return to room temperature to help it become pliable. While it's doing that, preheat your oven to 350F and throw down some tapioca flour on a clean work surface.
Also, now is a good time to line a baking sheet with some parchment paper.
When your Kung Fu is ready for action, gently roll it out as thin as you can without crimping or tearing into a large sheet.

Cut it in half.


Now cut into triangles.


Starting with the widest part of the triangle, gently roll your Kung Fu toward the tip.


Carefully bend rolled dough into crescent.

Brush crescents with your egg white. This will give it a nice golden glow and crispy outer.

Place in oven 15-20 mins. I like to undercook my baked goods a little, because they tend to finish cooking once you remove them from the oven (plus it helps the crescents stay ever so slightly chewy in the center-- and I love that).


Allow to cool so you don't burn your tongue (if you can stand waiting that long!), and enjoy while still a touch warm. Don't forget to make Paula Deen proud and serve generously with butter!

PJF Kung Fu

Sunday, November 20, 2011

Legend tells of a legendary gluten-free foodie whose cooking skills were the stuff of LEGEND. She traveled the lands in search of delicious food.
She liked to chew.
But she said nothing of it, because her mouth was often full of deliciousness
Then, she swallowed.
And then she spoke.
Enough talk, LET'S COOK!
"WHA-PA-CHA!"
Her cooking was so awesome, in fact, that those she served it to went mute from overexposure to pure AWESOMENESS!
She was awesome.
And attractive.
How could the people ever repay her?
No worries, my friends. There is no charge for awesomeness... or attractiveness.
"WHA-PA-CHA!"
It mattered not how many recipes she cooked, they were no match for her imagination.
Never before had a Primal Blueprint cook been so feared and so loved.
Even the most heroic heroes in all of Paleo-dom, The Furious 5 (Robb Wolf, Loren Cordain, Mark Sisson, Art De Vany, Kurt Harris-- who will probably be furious for being mentioned in a blog as goofy as this one), bowed to the great master.
But hanging out with them would have to wait, cuz when you're facing the 10,000,000 followers of conventional wisdom, there's only one thing that matters, and that's...

Hang on, my kid is calling me. Here, enjoy this completely unrelated clip until I can get back to you.


Okay... where were we? Oh, yeah, brace yourselves, Primal friends, I'm about to teach you KUNG FU!
The recipe below will revolutionize the Primal/Paleo culinary world. I have long tortured myself and agonized over it, because I felt like it was power in the wrong hands. Like Dr. Frankenstein unleashing his monster.
Most of all, I want to thank Shawn LoCascio for daring me to do this!

What you'll need:


4c tapioca flour
2c sweet potato flour(or 6c tapioca flour if you can't get sweet potato flour)
2 lbs butter (Oh, yeah, Paula Deen, I got your number!)
3c water
1 tsp salt
1T baking powder
some lemon juice
4 hours of your life that you'll never get back


In food processor, combine 1T lemon juice, 1 lb butter (broken into chunks prior to processing), a pinch of sea salt, 1c tapioca flour into a cream cheese consistency.


On a sheet of wax paper, turn the creamy paste into a 6" square. Lay another sheet on top and smooth out the square. Do not allow wrinkles to form in the paper.
When it's all squared and even, wrap and refrigerate. We will call this little friend "butter block".


In food processor, combine 2c sweet potato flour, and 2c tapioca flour with 1/4 lb butter (already chunked), 2t salt, and 1T baking powder into a coarse, crumbly mixture.


Turn out crumbs on to a counter top/working service that can retain a little chill, and is dusted with some tapioca flour (this is where the rest of your tapioca flour comes into play. Lots of dusting).
Form a small mound with crumbs, with a well in the center.
Starting with 1/4c, pour water into the well, and carefully pull some of the crumb in to begin forming a dough. Keep adding 1/4c water at a time until you've fully incorporated everything and have a dough ball. It will be a little tacky to the touch. Only add enough water as necessary. You don't want to end up with paper mache paste. That's why I encourage 1/4c at a time. Slow but steady...
It is very important to avoid kneading the dough as much as possible. Less handling = better end result.


When you have yourself a nice little dough ball, gently cut a 4 section cross partway through, like so. Wrap securely and refrigerate 15-20 mins.


After your dough has chilled, place it on a freshly dusted work space and gently unfold your 4 cuts, doubling the dough in size.


Carefully place your butter block (made earlier) into the center of the dough so that it forms a diamond.


Gingerly fold the corners of the dough over the butter block until it is fully concealed. (Ninja stealth mode!)


Dust the top of your doughy buttery block head with some tapioca flour and start to carefully roll into large rectangle, approximately 1/2" thick. Just keep dusting to prevent sticking and go slow and easy. It's a pretty temperamental critter, so just breathe and cater to it.


When you have a nice, neat rectangle, fold one side into the middle, then fold the other side over the top (like a pamphlet). Cover snugly and refrigerate 15-20 mins.


Remove your buttery dough pamphlet, dust with flour, and roll out into another rectangle, about 1/2" thick.


Fold yourself a new pamphlet. Cover snugly and refrigerate 15-20 mins. Repeat this 6 times. Make sure you are keeping track of which way you fold, because you need to turn it and fold it the opposite way on the next round. If your dough gets dried out, I suggest taking some of the remaining butter from the 2 lbs you set aside and melting it down. Brush it on just before you do a fold.
On the last fold, roll out to 3/4" thickness.
(look at all those sexy layers!)


Congratulations, young one. You now know Kung Fu.


By the way, it would be wise, young grasshopper, to cut what you think you'll need from today's batch, and carefully freeze the rest. Layer with wax paper between sections, and seal in freezer bag.


You're probably gonna wanna do this with it:


WARNING FROM MASTER PJF: I am calling this Kung Fu because it is high carb and high fat (a lethal combination). Please bake responsibly! <3


You may now bow to the master.

PJF Pilgrim Pumpkin Pie

Thursday, November 17, 2011

This time of year is full of the crisp scent of fall, warm goodies baking, and nog being swilled. It makes you want to have some pumpkin pie (unless you're like me & the only pumpkin-y thing you like is pumpkin chocolate chip cookies!). But first, A HISTORY LESSON! (Cuz I love history, especially when it comes to my New England heritage).

Early American settlers of Plimoth Plantation (which I've been to, and it's totally awesome. Make a point of visiting, mmmkay?), the first permanent European settlement in southern New England, might have made pumpkin pies (of sorts) by making stewed pumpkins or by filling a hollowed out shell with milk, honey and spices, and then baking it in hot ashes. An actual present-day pumpkin pie with crust is a myth, as ovens to bake pies were not available in the colony at that stage.

Northeastern Native American tribes grew squash and pumpkins. They roasted or boiled them for eating. Historians think that the settlers were not very impressed by the Indians’ squash and/or pumpkins until they had to survive their first harsh winter when about half of the settlers died from scurvy and exposure. The Native Americans brought pumpkins as gifts to the first settlers, and taught them the many used for the pumpkin. This is what developed into pumpkin pie about 50 years after the first Thanksgiving in America.

The early settlers of Plimoth Plantation brought English cookery and possibly some English cookbooks with them to the new world. The present day historians of Plimoth Plantation don't really know what cookbooks, if any, were owned by the 17th century settlers.
--From The History of Pumpkin Pie.

So we're going to go back to the year 1671, and do this pumpkin pie old school! Like... REALLY old school. So old, your Grandpa Grok would be proud. Aaaand, we're gonna use ingredients that may have been more seasonably available to our ancestors, rather than taking the "I can just go to the store and buy it" method.

What you'll need:


1 large sugar pumpkin (they may go under the moniker pumpkin pie pumpkin-- and mine is very small for demonstration purposes. Aim for jack-o-lantern size, or cut recipe in half)
12 eggs
1 can full fat coconut milk (like Native Forest or Thai Kitchen. The pilgrims probably used cream instead, but I'm being nice & making this paleo for you :P)
1.5 cup Grade B dark amber maple syrup (the bulk of it cooks out, and yes, the Grade B dark amber part IS important)
1 can pumpkin puree
1/2T light molasses (not full bodied)
1/4c cinnamon
2T allspice
1T nutmeg
1T ginger
1/2T ground star anise
1/2T ground cloves
1T vanilla extract
pinch of sea salt

preheat oven 350F (honestly, if I had my way, there would be a pit in our yard with smoldering hot coals... but I don't think the husband would be very amused!)

Cut top off of pumpkin, and gut it. It's Halloween all over again! Make sure the "lid" is cleaned too. Give the pumpkin a good scrubbing so it's all perty for the party.

At this time, place your pumpkin into your pre-heated oven for 30 mins. Meanwhile, in large pan over medium heat, combine eggs, coconut milk, maple syrup, pumpkin puree, molasses, cinnamon, nutmeg, ginger, and allspice.

Whisk together just until warm bubbles begin to form.

Remove pumpkin from oven and pour custard into pumpkin cavity. And if you're thinking that maple syrup is gonna give you cavities, quit it. A lot of the sugar bakes off and we want the mapley sweetness to balance out the savory of the pumpkin. Fill to within 1 inch of top.
Make sure you wipe off any moisture (splashed custard) from the outside of the pumpkin prior to baking.

Place pumpkin in glass baking dish with the lid on it. Bake until custard is set (about an hour & 1/2, but check it at an hour.)

Remove from oven and allow to stand at room temperature until comfortable to handle. Cut yourself a slice and dig in! It's bound to be a showstopper ;)


A NOTE FROM THE PJF: If you plan on making this for Turkey day, it's a great thing to do right after the big meal. While your guests are busy succumbing to a tryptophane-induced coma, you can magically assemble this Thanksgiving classic. By the time they wake up, you will be slicing into the showstopper!